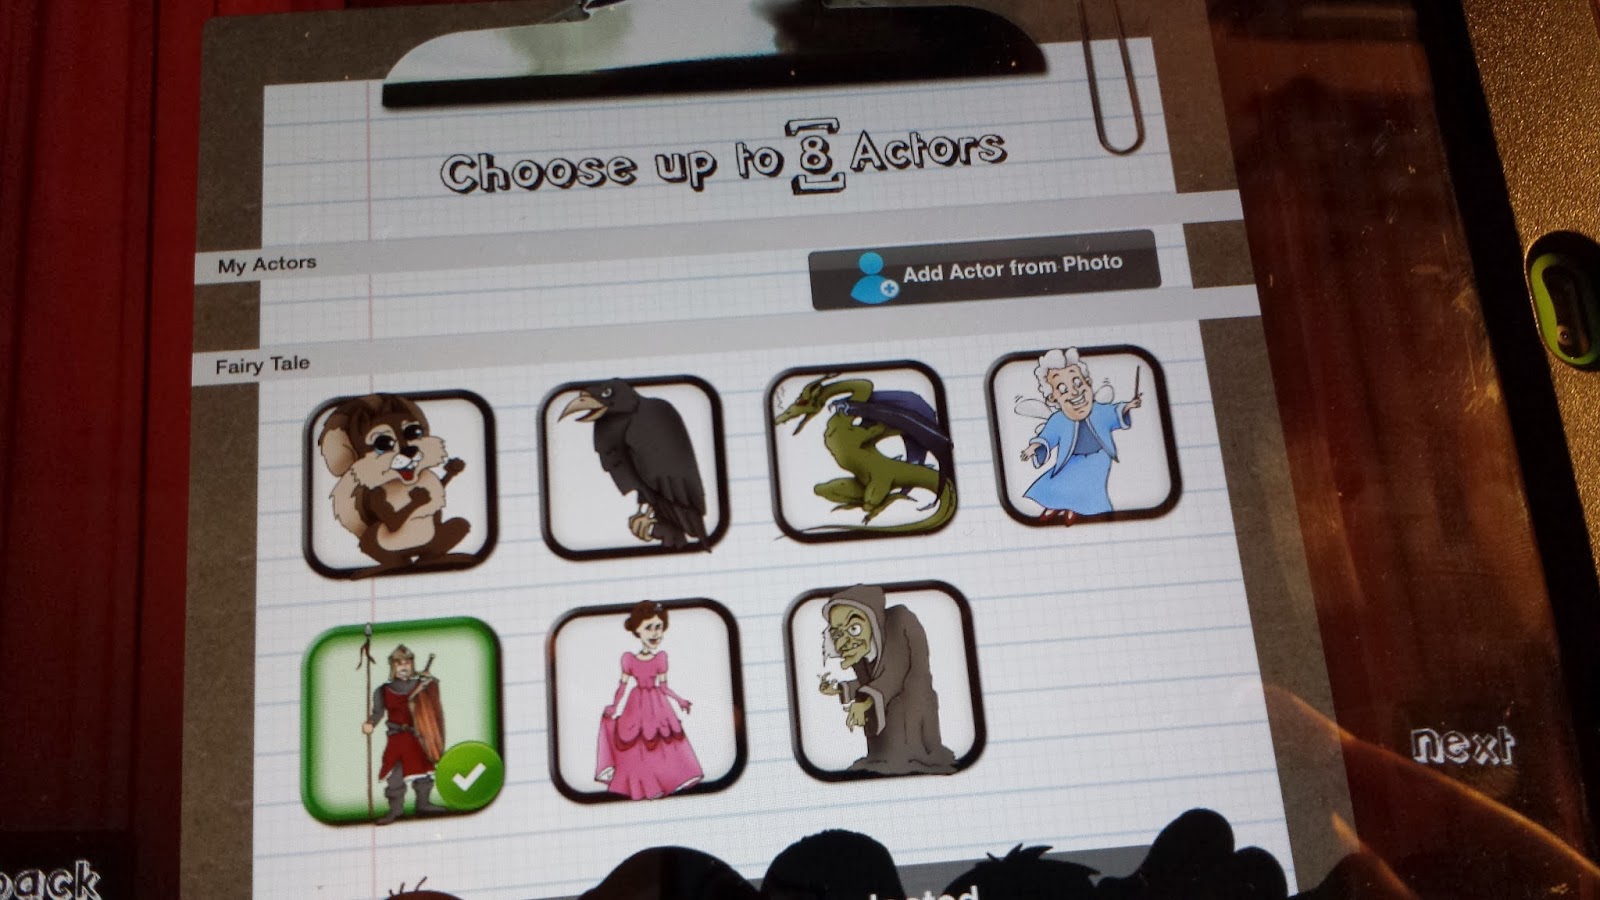
The free version comes with one collection of characters/backgrounds: Fairy Tales. It includes 7 characters and 3 coordinating backdrops. It also includes the ability to import your own photo and use it as a character. The paid version includes nine more sets of characters/backdrops at .99 each. OR, you can buy the Director's Pass at $2.99 and get them all! The other themes include Monsters, On the Farm, Political Par-tay, Christmas, Talk Shows, Zombie Attack, Pirates, Fairytale, and Wild West.
Here is how to use it. Be prepared for how EASY it is to make your own movie!!
Tap to find the Puppet Pals app. If you have a lot of apps on your iPad... this may be the hardest step! LOL
[1] Click Press to Start. This will take you to the Actors page.
[2] In the free version, you have access to the Fairy Tale collection. It includes a mouse, a crow, a dragon, fairy godmother, knight in shiny armor, princess, and an old hag. You can choose one or more characters for your story (up to 8 actors). Just click the ones you want.
In the Actor page you can also bring in your OWN character! Just click the Add Actor from Photo option. When you do this you can take a picture from your i-product and save to your camera roll OR just choose a picture from your camera roll. Choose the picture you want. This takes you to a page where you 'cut out' the picture you want. I like to take a picture of my students so they can be part of the scene! Just 'cut out' their picture from the photo by tracing their body with your finger. A green line will appear to show you the cut line. When you lift your finger, it automatically cuts out the picture. If you don't like it, press reject and try again. If you do like it, click accept and it adds it to the My Actors list which is found on the Actors page.
Want your student to fight a dragon and have the knight come to save you? Choose those 3 actors.
Now click Next.
[3] Choose a background and click next. You can also choose more than one background if you are going to do more than one scene! If you do this, you'll find a giant corded rope that hangs from the ceiling on the next page. You'll just "pull" the rope to change scenes.
[4] You are now "on stage." There is a slider at the bottom to make the scene bigger or smaller. I suggest leaving it where it is so that your actors can 'walk' off stage.
You can 2 finger to enlarge/shrink your actor or to rotate them.
[5] Click the red 'record' button at the top to begin your recording. Touch the actor and speak to make them talk and move them around the scene. If you have two actors who overlap a bit, whichever actor you are touching will come to the foreground. When you touch the next actor, that one will come to the foreground. If you want the scene to be empty when you're finished, just 'walk' them offstage.
[6] Click the square button to stop the recording. At this point you can click the "disk" icon to save the recording. Give the story a title and click save. You can now click yes to the Do you Want to View and it will show you some options. You can play the scene from there or you can export your video. It exports to your camera roll so you can take it from there to your computer as you would any picture or video through your itunes account.
Have fun with this incredible iTunes app. Even my PreK students are able to do this one on their own start to finish. Great for oral language skills and vocabulary.


I love this app! We used it today to do some story telling.
ReplyDelete